
How To Start A Blog With GrooveBlog In 2021 - A Step By-Step Guide

How To Create a Blog With GrooveBlog
In this post I will share my steps and experience with GrooveBlog for launching my groovepreneur.io blog for primarily for the benefits of fellow Groovesters.
I will share my brutally honest reviews, "how-to" articles, training videos, opinions, and experiences with the Groove Platform. Hopefully, there will be some gold nuggets in them hills that you will find valuable.
Disclaimer
Some of the links in this post are affiliate links, meaning should you visit them and make a purchase, I might make a small commission with no effect on you, the visitor. Thanks for understanding.
Getting Started with GrooveBlog
I debated long and hard whether I should get things started with the Groove supplied subdomain, i.e. {blog}.grooveblog.com, or acquire a new domain and use it from the get-go.
Obviously, both options are viable for the short term, however, having an actual domain is better for branding and more appropriate in the long term I think...
Anyhoo...
Here's what you can achieve in a few hours. Please note, that this is not meant to be a comprehensive tutorial - you can check that at How To Create A Blog in Groove.
At the same time, I recommend following the steps below in the order shown, so that you can avoid back-tracking and re-doing some of these steps.
The Blog's First Post(s) Objectives Are
- Document create and configure a new blog with the GrooveBlog app.
- Create a post or two that includes images, videos, links to internal pages, affiliate links, internal document links (like a table of contents), and an email link.
- Add at least one fancy feature that is not available out of the box, but one that you may find useful for your blog
- Document the findings and the general experience.
- Arrive at some conclusion with respect to a GrooveBlog blog.
Step 1 - Secure A Domain Name
Open a new browser tab and visit your favorite name registrar (Namecheap, GoDaddy, etc.) and get a domain.
Mine is Namecheap. Not only are their offerings, tools, and features top-notch, but they also provide FREE domain privacy for the life of your domain. Domain privacy is very important and is highly recommended regardless of where you buy your domain from. for details, visit Namecheap's domain privacy page
If you need inspiration, a good place to research domain names is a LeanDomainSearch.com
Once your domain is secured, I urge you to create a Gmail email (that always sounds funny to me 🤣). Trust me this will be highly beneficial for a number of reasons, including messaging, configuring Google apps, further enhancing your brand, etc. Ours is [email protected]. Feel free to contact me with any Groove-related questions either there, or at [email protected].
Step 2 - Configure the Domain In Your Groove Account
Once your domain name is secured, you will need to add it to your Groove account. This can be done by clicking on your Profile Picture, selecting My Account, and then selecting the Domains tab.
Once there, select Custom Domains and click the Manage button.
In the resulting screen, you should see the list of domains configured in your Groove account.
Click Add A Domain and follow the instructions for adding your domain.
For a more in-depth tutorial, check out the How To Manage Domains In Groove guide.
Step 3 - Create Your New GrooveBlog
Creating your new GrooveBlog is relatively straightforward. As shown in the short clip below, select the GrooveBlog icon from your main Dashboard, Click the New Blog button and supply the name and blog subdomain as requested, click Done, and a few short seconds later, you shall have a brand new published blog a the subdomain specified.
One thing to note about "subdomains' is that the name provided has to be unique across the whole GrooveBlog.com ecosystem as grooveblog.com is a shared domain for all blogs. Regardless of the name supplied when the blog is created, it can be changed at a later time via the blog's settings.
Step 4 - Configure Your GrooveBlog
Once the blog is created, there are a few quick steps you should take in order to differentiate your blog from the thousands of other GrooveBlogs created with the same template:
- Add a Logo and a Favicon. This can be done very quickly in Canva by creating two designs. I created a 500x125 image for the logo and a 500x500 for the favicon. The perfect image sizes are still subject to assessment to determine what is the best option for both.
- Modify Post Categories. This may be important depending on how you want to structure your posts.
- Configure Your Social Links. This entails in setting up links to your Facebook page, group or profile, YouTube channel, etc.
- Allow Facebook Comments. If you already have a Facebook app created for this purpose, you can leverage it by supplying the Facebook App Id, the size of the widget, and the number of visible posts. Our settings are 700 wide with 10 posts showing. To see how this works, take a look at the bottom of this article 😎
- Ignore other settings for now. There are a number of other settings available in the form of forms, copyright text, the embedding of adds, pixels, etc. This can always be revisited - especially since some of these functions do not yet work as of this moment.
Once finished with the general blog settings, the next step is to clean up the header and the footer navigation. This is available via the "link" button on the GrooveBlog dashboard.
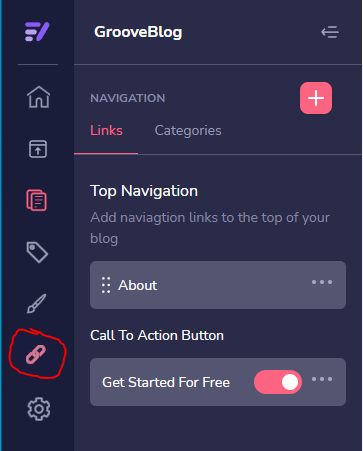
Use this section to create links to privacy policies, terms and conditions, about and contact sections, or any other pages/posts deemed important. Use the interface provided to add, delete, modify, re-arrange the links according to your desired look and feel, and behavior.
⏩ TIP - GrooveBlog does not seem to have a concept of pages and posts like WordPress does. Every "page" is a post with its own slug (i.e. URL, or address) which can be directly supplied when creating these links
Step 5 - Create Your First Few Posts
Once the shell of the blog is created and configured to your liking, it's time to create your first few posts before you officially launch your blog to the world. By this, I mean announcing it to your friends, family, clients, friends, enemies (ok, maybe not your enemies) know via your preferred social media presence.
My goal was to document the steps taken to launch this blog.
Some of the difficulties I have encountered centered around losing certain post settings from time to time (available via the settings cog when editing a post)

▶ The most important settings here are:
- Featured Image - No blog is complete without a featured image. Supply your own or select one from the free library provided by Groove. Interestingly enough, the featured image does not show in the post itself, it has to be manually added. I suspect this will be addressed at some point by the GrooveBlog development team, (well - it should be), in which case your post will contain the image twice.
- Post Slug - this is in essence the address of your post. Make it nice and readable
- Add To Carousel - this setting, when turned on, will show the post on the home page's image carousel. Obviously recommended for new posts.
- Show on Homepage - as with the carousel, this setting should be on for new posts
- Allow Comments - I believe this is important especially if you're soliciting any form of interaction with your content. See below 😛
- Excerpt - This section allows 200 characters which will be shown on the home page, and it represents a quick summary of what the post is about.
The other settings will come in handy for SEO (the Metadata section) and social sharing (the Open Graph section). Will revisit these once the post is (officially) launched to assess their behavior.
⏩ TIP - The changes made in the post settings disappear from time to time, as such I recommend creating the text elsewhere (say a draft post or in a text document for quick access and re-entry). Publish Often!
Step 6 - Publish Your GrooveBlog
Just keep hitting the [Publish] button in the top right corner. If you want to switch the post from live to draft mode, keep hitting the [Switch to Draft] button.
It's that simple, just do it often!
Revisiting The First Post Objectives
The objective of the first post was to
⏩ Document creating and configuring a blog within GrooveBlog
This is achieved by this post.
⏩ Create a post that includes images, videos, and various links
In this post, you will find the following link types. Full disclosure, some of these links are in fact affiliate links, meaning should you visit them and make a purchase, I might make a small commission with no effect on you, the visitor.
- Images - there are many in the post
- Videos - There is a short video, created from a quick PowerPoint presentation exported into an mp4 video, which is hosted on Groove's GrooveVideo platform. See Step 3 - Create Your New GrooveBlog. One interesting aspect is that embedding a video into the blog post only worked by adding a custom HTML block with the video link code supplied by GrooveVideo. Details to follow...
- Inter Document Link - (i.e. links to other posts within the site) How To Create A Blog in Groove.
- Regular Link - Namecheap's domain privacy
- Affiliate Link - The Groove Platform Is Free Forever. Please note, that Google requires affiliate links to be marked with the nofollow attribute, which at this point is not implemented by the GrooveBlog editor.
- Email Link - [email protected]
- Internal Links - are not available at the moment. As such, a table of contents is not a feature one can implement in a blog post at this time
- Links in General - they all have a target="_blank" attribute, meaning that all links open in new browser tabs. Not cool!
⏩ Add at least one fancy feature
One missing feature that I personally like is the ability to create a two-column paragraph as seen at the beginning of this post.
This is not something that is available out-of-the-box in the GrooveBlog editor. There is however the ability to add a custom HTML section which I explored to see how it can be leveraged.
Add Custom HTML by clicking the (+) sign in the editor and then selecting the </> icon

Paste your HTML in the box below:
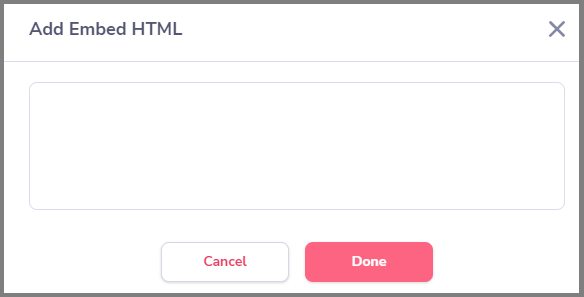
Here's the HTML That creates the two-column entry above. Interesting side note, the Groove platform implements this in an IFRAME, which is a very interesting software design decision, which, IMHO as a developer, creates more problems than it solves.
Having said that, here is the html that creates the two columns by using the <table> element. Play around with the various options to achieve your desired outcome.
<link href="/css/style.css" rel="stylesheet">
<table border="0" cellpadding="2" cellspacing="2" style="width:100%">
<tr>
<td style="padding:10px;width:65%" valign="top">
<div class="ql-editor">
<p>Hello There 🙋♂️.</p>
<p>My name is Joseph and I am a software developer/architect by day and a Groovester by night.</p>
<p>I have created this blog to collect and document my experience with all things <a href="https://groovepages.groovesell.com/a/{Your Affiliate ID}" target="_blank" style="color: rgb(194, 133, 255);"><strong><em>Groove.cm™</em></strong></a>.</p>
</div>
</td>
<td valign="top"><img src="https://assets.grooveapps.com/images/{Your Image Source}
" alt="{Your Image Description}" height="300">
</td></tr></table>
Please note, that once you add your embedded HTML to the blog post, it cannot be edited! In order to make changes, you will need to keep deleting the section and adding it again. And again. And again. I suspect the developers will be (hopefully) addressing it at some point.
⏩ Document the findings and the general experience
My basic experience with the GrooveBlog app is a positive one. Once the quirks are and their workaround is identified, it's a pretty simple and effective way of creating and maintaining a blog.
How good is it with SEO, time will tell. AFAICT (as far as I can tell), some SEO sections do not work, adding code and pixels to the page does not work (search for the two 'alert' functions, (alert('pixel in the body') was added to the <body> tag of the Tracking and Pixels section of the blog's settings, alert('custom code in the post') was added to the custom code section of the post, both showing up as general text). These will be removed within a week or so, right now it's there for illustration purposes.
I like the fact that one does not have to worry about plugins, however, I do suspect that at some point some form of a plugin infrastructure will be introduced... The "pain" of having and maintaining plugins is insignificant compared to the benefits they provide. The speed and efficiency of creating blog posts may be attractive to certain types of blogs, but in no way is it an appropriate general solution.
Here are some plugins that would be extremely beneficial. This does not include page builders, caching mechanisms or security plugins as those can and should be provided by the platform (and I suspect in some way they are).
Having said that, here's my list of plugins that would go a long way to improve the experience:
- An SEO Plugin - to help those who need handholding when creating content that requires SEO for traffic and page ranking (HIGH)
- An Image Compressor - For example, the featured image of this post is (was) 3MB. This needs to be compressed in order to achieve the fast page loads that Google rankings require (MEDIUM).
- Caching Mechanism - Although some of it should be provided by the platform, controlling a caching mechanism could go a long way of improving page scores
- Site Backup, Import/Export, and Affiliate Link Management Tools
- Backups are important in the long term once the number of posts multiplies (LOW)
- The import / Export feature would go a long way to have the ability to import and export posts or a whole site. (Groove Team: maybe these features exist, I have not seen anything related) (LOW)
- Link Management Tools are important for tracking purposes and for configuring links to behave the desired way. (HIGH)
Perhaps these would (could) be incorporated into the editor itself, in which case, there would be no need for these plugins.
⏩ Arrive at some conclusion with respect to a GrooveBlog blog.
That you will find below...
Conclusion and Final Thoughts
Here's what I found, the good the bad and the ugly, in reverse order 🤣
The Ugly...
As it stands today - it will not be a competitor for WordPress or Wix, or similar offerings any time soon.
A quick check at Google's PageSpeed Insights gives a score of 14/100 for mobile. and 21/100 for desktop browsers.
Admittedly, a large part of the bad scores is due to unoptimized images. I suspect that addressing those would increase the score to some degree. On the other hand, the sheer size of some of the CSS and JavaScript code files is HUMONGOUS!
For example:
- ./widget/app.css(widget.groovevideo.com) size is 1.6 MB
- …js/chunk-vendors.523835c4.js(app.groove.cm) is 2.1 MB
These two files with a few other mandatory ones represent OVER 5MB of data before any images or text are even factored in...
I will investigate these further to see what can be done for improving this. Stay tuned...
As you can see, the shortcomings are many, and this blog will try to persevere through all the good, bad, and ugly 😂
The Bad...
The editor is OK but needs some refinement. The fact that one cannot "edit" any embedded HTML or properties of images is an inconvenience - but can be worked around.
Given that the app is still in beta (as we speak in mid-October, 2021), some of the quirks noted above are understandable. I suspect some will be addressed prior to the January 2022 launch.
And The Good...
It works (sort of). And It has a future. And It's FREE. And It's (mostly) hassle-free. Given all the offerings, features, and digital marketing tools available even in the FREE version of the Groove.cm platform, should warm every beginner blogger's and digital marketer's heart.
My general conclusion is that GrooveBlog, as it is today, is a pretty decent tool and is a viable solution for small niche or starter blogs. Please keep in mind YMMV (your mileage may vary) especially when it comes to SEO.
So what do you think? How does your experience compare to the above if you have used the platform? What are your thoughts if you have not yet checked it out (but somehow read this post)?
Would love to have your feedback. Please comment below or send me an email at [email protected]
Thanks for reading,
Joseph.